
Volleyball is a sport in which you are normally coached and trained as a team, but each player and each position can be very different and need outside training. If you’re looking for some individual training ideas, this article is all about how to understand and practice setting in a better way.
Whether you’re the new setter on your volleyball team or just looking to improve your overall game, we can all use ideas to improve our setting skills. This article will share all kinds of setting tips, concepts, and drills for improving your setting.
If you are brand new to setting, or volleyball in general, start off by reading our Beginner’s Guide To Setting A Volleyball.
1. Pay Attention To Your Setting Stance
When you’re a setter, you will spend almost all of your time in one of two stances: your athletic stance, and your “down and ready” stance. Down and ready is the stance used when you’re on defense.
Pretty much the rest of the time you’re playing as a setter, you’ll be in your athletic stance. This is feet just a bit further apart than shoulder-width, knees slightly bent, one foot slightly in front of the other, and arms relaxed but ready.
2. Be At Your Setting Location
Your setting location is the place where you are supposed to run your offense. This could vary slightly depending on your team and your coach, but typically this is the front right side of the court, between position 2 and position 3.
For an explanation of the position numbers, you can visit this article The 8 Parts To Understanding Rotation In Volleyball.
You will face the left side of the court. You should be standing about one arm’s length away from the net (this is easy to measure, stretch out your right arm, can you barely touch the net?). This position is the ideal spot to run your offense.
You can easily see everything the other team is doing and be ready. You can see almost everyone on your team with little movement. The only person who is completely out of your view is your right-side hitter. You will receive the ball as close to this position as possible because you have so many options.
From here you can set your left side hitter with a strong push. Another option is to set the middle, this is great for running quicksets. You can also backset your right-side hitter. If you need to mix it up, from this position you can set the back row with ease. Setting the back row is your last option, and usually the least effective as an attack.
If you are the team’s setter, own this spot. Be there every time. Demand that your team brings the ball to you. They won’t be able to on every pass and dig but set that expectation.
You can’t run an offense running to play fetch just because your teammates are lazy or sloppy. Be consistent about being there and being ready to present a strong message that THIS is where I’m running our offense from, bring me the ball!
3. Say “NO” To Backpedaling
Young setters often find themselves having to backpedal to get under the ball when it’s passed a little too far. When you backpedal you lose some of the control, balance, and power you need for a solid set. You will often see someone who backpedals to the ball simply set straight up in the air because they can’t get the right push behind the ball.
Instead, use crossover steps to open up your stance and move to where you need to be, and turn in time for your set. This allows you to keep all of your options open. You will still be able to set anywhere on the court.
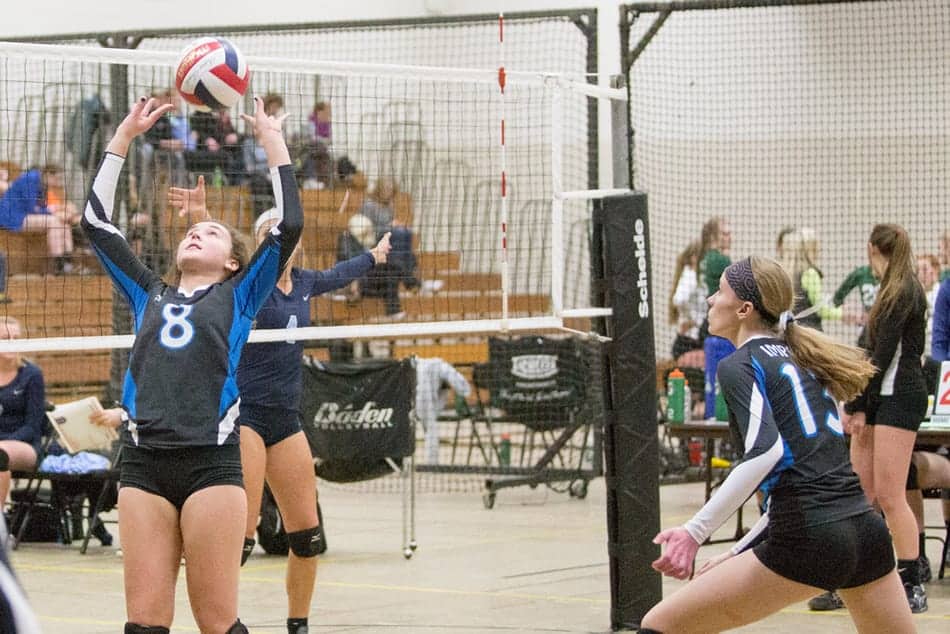
4. Square Up To Your Target
As you make your set, you need to adjust your body to square up to your target. What does that mean? As you are volleying, you want to be facing straight toward the location you are sending the ball.
Your feet, waist, shoulders, and hands should all be facing toward the target. This sounds simple, but often players are facing the direction the ball is coming from and they don’t adjust.
Other times you may be tempted to square up to the person you are about to set. You shouldn’t square up to them, but instead, the location that they will be striking the ball!
The exception to this will be with your backset. For backsets, you will do your best to be exactly the opposite of squaring up. So if you turned exactly 180 degrees, you would be facing your intended target.
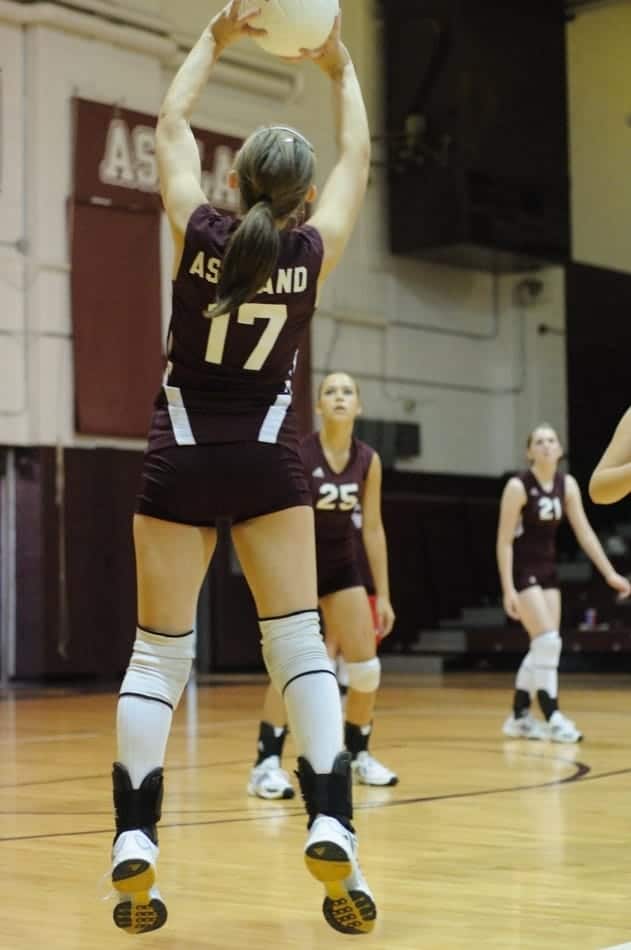
5. Take The Ball Above Your Forehead
As you are being passed the ball, you can’t stay still and expect the ball to come exactly to you. You need to adjust to the pass and make sure you’re low enough to be able to volley effectively. You also need to track the flight of the ball and make sure to take the ball above your forehead.
That means you should move in such a way that if you didn’t use your hands, the ball would bounce straight into your forehead, right on your hairline. In this way, you’ll be in the perfect place to set the ball in a balanced and controlled way.
To learn more about this idea, check out The 9 Tips for Amazing Back Setting.
6. Move With Your Hands Down
When you move with your hands up, you usually move slower and can actually have a harder time judging the ball. Move with your hands ready in the ball receiving shape, but down until you arrive.
7. Your Hands Should Be Early
What? You just said don’t move with your hands up. That’s right! Move with your hands down, then snap those hands up quickly.
One easy tip that improves your results so easily is to practice getting your hands up and extended before the ball arrives. Often, players wait until the last second to get their hands up and end up with poor results.
By extending your arms ahead of time you are prepared for the ball and can gain better control and motion. This will help your contact be smooth instead of the tendency to slap the ball when you get there late.
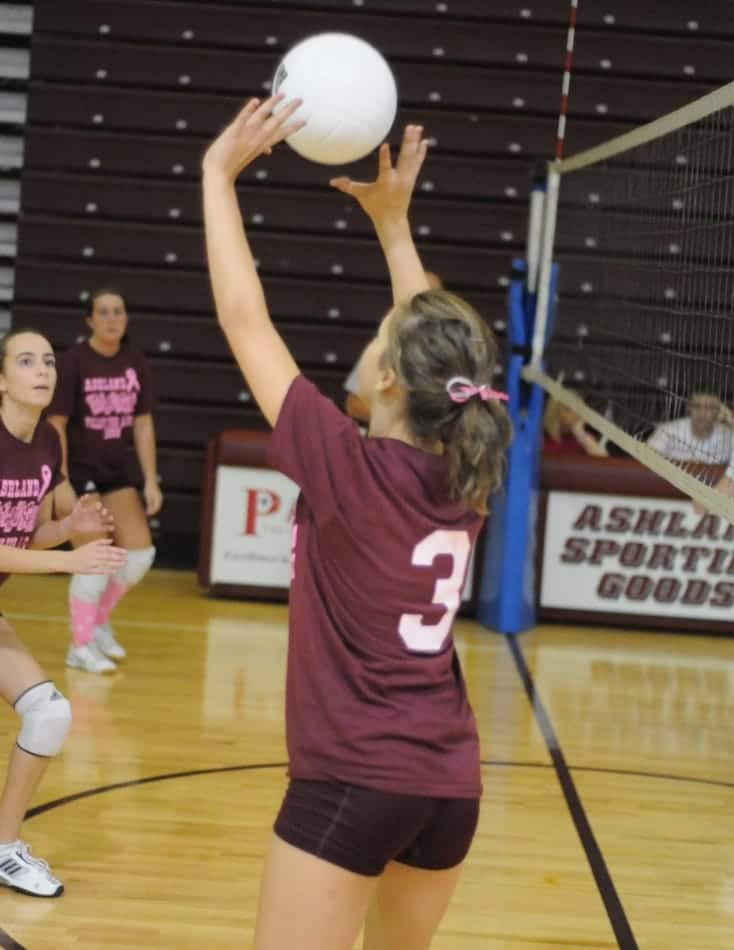
8. Flexible, But Firm Hands
When you’re setting, your hands need to be flexible, but firm. The correct hand position is about 1 ½ inches apart at the thumbs and index fingers. Your hands should form a triangle open space.
Your hands should also be in the shape of holding a ball. As the ball arrives, your hands and fingers will absorb the ball and then send it out to your target. You are using the pads of your fingers to do the volleying, not your palms. As you make contact with the ball, your thumbs should be above your eyes, evenly spaced apart.
9. Flick Your Wrists, Superman!
When you’re setting, you need to push. The pushing motion should have a very fluid flick of the wrists, while you extend your arms out like Superman. The difference is Superman flies with his hands flat or maybe a fist, while your wrists will be flicked out with your fingers extended. Your palms should end up pointing out away from you to the sides.

10. Use Your Legs to Set
It may seem odd, but to be a very good, strong, and consistent setter, you really have to practice using your legs. If you just use your arms to set you will have some major problems. You won’t generate enough power for setting outside properly.
You will struggle to push hard enough to control a ball that’s spinning wildly when you’re taking it. Most of all, you’ll get worn out quickly and your sets will suffer because your arms will be tired.
When you consistently use your legs to generate a large amount of power for the set, that spreads out the demand on your muscles. The power of your sets comes from 3 places: your legs, your elbows, and your wrists. Which part sounds the most powerful? Your legs are very powerful, they lift your body weight all day long and in every exercise you do.
When you’re setting using your legs, your passing becomes a full-body coordinated motion.
11. Use A Weighted Volleyball
A weighted volleyball is a great tool for taking your setting to the next level. My daughter Heidie has really seen improvement in her power and accuracy after using hers.
Have a coach, parent or partner just toss you the weighted ball and set the ball just like you would a regular ball. Make sure no matter how far you are trying to set, that the tosser is not tossing this ball to you from very far away.
This ball is heavier and you’re not trying to injure or strain your hands (or take a ball to the face). The goal with this is not for you to practice receiving a heavy ball but pushing strong through your set. Practice different heights and distances, doing 5 or more of each before moving on.
Can you set your outside hitter with this ball from your regular setting position? Focus on pushing with your whole body. You will develop stronger control, which will help you push the regular ball strong enough to get to your target.
Practicing with the weighted ball is one of the main ways to learn to control the spin of the ball.
12. Learn To Jump Set
The jump set is often misunderstood by young players. You will often see setters jump as they set or even after they set. A real jump set is first a jump, then while in the air, a set!
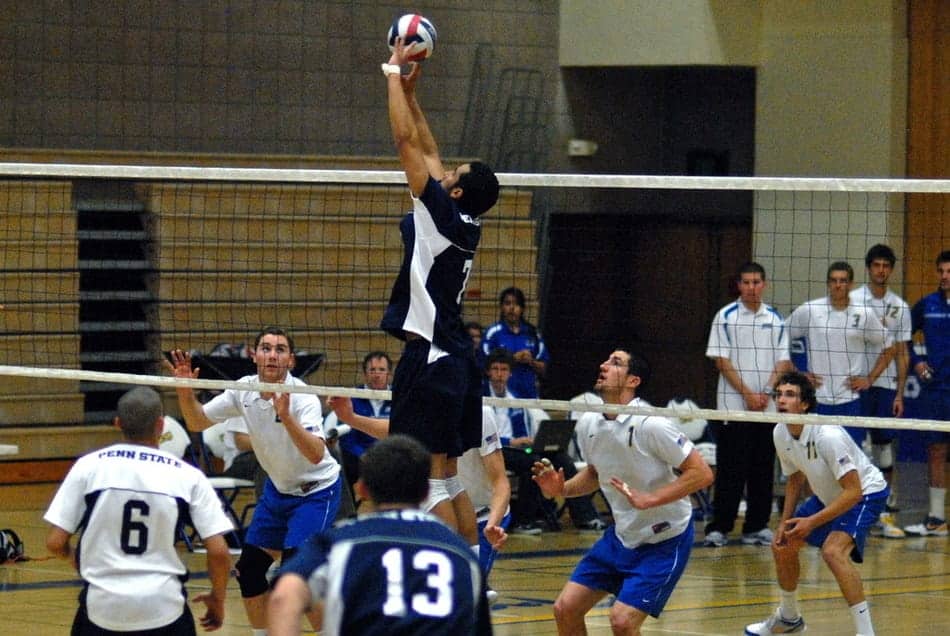
The idea is that you are contacting the ball above or close to the top of the net and that you are an offensive threat to the other team. If your opponents don’t respect your jump set, simply dump the ball for an easy kill. If they do respect your jump sets, this challenges their blockers to keep up with both you and your hitters.
13. Learn The Setter Dump
Dumping the ball as a setter is when you contact the ball up above the net and you perform a hit instead of setting. You will appear to be about to set, but then drop the hand closest to the net and use the hand furthest away to hit the ball over.
**It is crucial that you only perform this move when you are on the front row of the rotation. It is illegal for you to attack the ball above the plane of the net when you are a back-row player in the rotation.**
Reasons For Using the Setter’s Dump
- If your opponents don’t respect your jump set, you can simply dump the ball over the net with a surprise hit. Burn them once or twice and they’ll have to assign you a blocker. This takes your offense to the next level because you’re adding pressure to the other team to figure out how to guard you and block your hitters on the same play.
- To save the ball when it’s passed too high or close to the net. You don’t want your opponent to block or even hit the ball, so sometimes dumping it is the best option. Try to dump in a tough spot for your opponents to get. Take every opportunity to make them scramble to keep them off-balance.
- To mix up the offensive rhythm. If your offense is running rally after rally doing the same 3 hits, the defenders are going to be able to run their blocks consistently. By dumping 1 or 2 balls each set, you keep them honest and they have to respect you enough to defend your jumps.
Learning Setter Dump Deception
The key to the setter dump is deception. Your dump will not have the speed of a regular hit. To make this work you want the other team to anticipate you setting someone else until the last possible second.
To sell the deception, you should jump set often. By doing it over and over, they don’t know when you’re going to pull the trigger with your surprise attack.
You also want to keep your hands in a setter position until the ball is nearly within your reach. You are not winding up for a spike, you’re going to keep your hands in setter position, then at the last moment, drop your net-side hand (usually your right hand) and use your other hand to dump the ball over.
You’re going to turn your dumping hand to face the direction that you want the ball to go. Use the pads of your fingers to make contact. You should contact the ball above if possible and snap your wrist just like any other kill.
You want this motion to be smooth and fast. Do not give the ball any upward trajectory, you want it to drop quickly and die so the other team has no time to react.
An even sneakier and more unusual move is to dump with your right hand. This will be a more awkward motion, but if you practice it, can score some easy points.
As with your typical dump, begin with your jump setting position, then wait for the ball to get right above your head, twist your right hand so that your palm is facing you (behind the ball’s trajectory), and dump the ball behind you.
This is most powerful when the ball is passed to you a little too close to the net and you’re contacting the ball above the net anyways. You are not really adding power to the ball, you’re just controlling its path.
Setting Drills
1. Quick Hand Placement Practice
Put your hands in the correct position described in the last tip. Now bring them down and place them on your stomach. Have a partner (or coach or parent) slap the ball and quickly toss it to you. When the ball is slapped, you flip your hands up, paying attention to the position, and simply catch the ball. Freeze in place with the catch and look at your hands.
2. Shaping Your Hands To The Ball
This isn’t so much a “drill”, but something you can do anytime, anywhere. To practice getting your hands into the ball shape, put your hands on your hips. Then keeping that shape, bring them out in front of your waist. This is the place you’ll keep your hands as you’re running to your setting spot. Then bring them up above your face into a setting position. The ball is round, so simply placing your hands on your hips gives you a good reference as to how your hands should be ready to receive.
3. Setter Progression
Get a partner and stand about 6 feet away from each other. We usually practice with one person with their back to the net.
Step 1
Sit “criss-cross applesauce,” where your back is to the net. Your hands start flat against your stomach. Your partner stands a step behind the 10-foot line, slaps the ball, and lightly tosses it toward your head. You flip your hands up and you set it back to them. Do this 10 times and then switch with your partner.
Step 2
All you are changing with each step is the positioning. In step 2, you’ll kneel on one knee instead of sitting on the floor. Do the exact same tossing and setting.
Step 3
Standing in your athletic stance. Your feet should be a little more than shoulder-width apart, one foot slightly forward (usually left). Again you’re repeating the slap, toss, set pattern.
Step 4
If you are doing this drill with a team some pairs will get done sooner than others. If you are finished, set back and forth with your partner until all pairs are done with the progression.
4. A Chair, A Ball and A Wall
For this drill, you need a partner. The setter sits in a chair that’s about 8 feet away from a wall. The chair needs to be facing perpendicular to the wall. The partner will be tossing the ball to the setter, who needs to remain seated the entire time.
The tosser begins just slightly to the side in front of the setter. The tosser throws the ball and the setter must set against the wall and be able to catch the bounce. Agree on a spot on the wall as the target.
You can use an air vent, a clock, or other landmarks to assign a height to aim for. A taped square on the wall about 1’X1’ would be great.
The tosser should remain in this spot until the setter has performed 5 solid sets. Then the tosser takes one small step to the side. Repeat 5 solid sets. The tosser works their way around until they are directly behind the setter (the setter being in between the tosser and the wall, facing sideways to the tosser).
Try to make it so that there are around 5 positions that the tosser moves to before arriving at the final spot. In each of these positions, the setter is being forced to control their upper body to adjust to the ball and get behind the ball while remaining seated.
If your partner is going to do this drill as well, switch now.
In the second part of the drill, you turn your chair to face the opposite side and repeat the entire process. This drill should be slow and methodical. Focus on good technique.
If the set is poor or the player can’t catch the rebound, don’t count the set. Try to become consistent at controlling the ball at these angles.
Related Questions
Can A Setter Spike The Volleyball?
The setter may hit the ball as long as they are a front-row player in the rotation or if they make contact below the plane of the net if they are in front of the 10-foot line.
If you are playing from the back row, for the referee to not call you as attacking above the net, players should not jump, but hit from a standing position.
If you are behind the attack line, then, by all means, jump and spike away!
Can A Libero Set The Volleyball?
The libero has often been used as the backup setter. If the setter has made the first contact, the libero may be the next best option to make the set.
If they are behind the 10-foot line, the libero may set the ball as normal. If they are in front, then the rules get more complicated for the libero. They can choose to underhand set (which is using your platform pass to set), or they may perform a normal set, but then the attacker must not jump, they must attack from a standing position.
The other possibility is if the libero is close to the line, they may lift the foot that is touching or across the line before making the set so that their remaining foot places them technically behind the line during the set.
To learn all about playing libero, check out our article called Master Guide To Liberos In Volleyball: Rules, Rotation, And Tips.
Photo credits:
Player #17 image by Dan Morgan on flickr.com: https://creativecommons.org/licenses/by/2.0/
Player #8 image by popo.uw23 on flickr.com, available in public domain: https://creativecommons.org/publicdomain/mark/1.0/
Player #12 image by Neon Tommy on flickr.com: https://creativecommons.org/licenses/by-sa/2.0/
Jump setting image by KLM volleyball on flickr.com: https://creativecommons.org/licenses/by-nd/2.0/
Player #3 image by Dan Morgan on flickr.com: https://creativecommons.org/licenses/by/2.0/
Recent Posts
Athletes, listen up! Do you have a closet full of old jerseys, sweatpants, and tees that you just can't seem to part with? Well, dust them off, because you're sitting on a goldmine of fashion...
You may have heard, or you may have noticed, that there's been a change to the rule about double contact in volleyball. In 2022, an experimental rule change began to be implemented, where the double...