
There are so many terms in volleyball that are unfamiliar that it can be dizzying. As a new player, parent or coach you may be lost in some of these volleyball terms.
So what is a shank in volleyball? A shank is a mishit that makes the ball completely unplayable. Every player has had the experience of going to receive a serve and then finding out that they weren’t ready.
The ball goes wild, far to the side or maybe behind you. It’s embarrassing and may get you benched. The good news is, you can fix this.
How to Stop Shanking the Ball
This a major challenge for many players and something you must adjust to and develop further at each level. The serves are coming harder and faster and with greater spin. The hits are more and more targeted, increasing the challenge to dig or pass properly.
Whether you are trying to stop shanking serves or hits, the tips are the same, but for writing purposes, I’ll be referring to serves. Here are some pointers and some areas to work on:
Get Into Position Faster
One of the most common reasons for shanks or bad passes, in general, is that the receiver didn’t get into position until making the hit or maybe they never made it into position at all. This really comes down to 2 things:
Make The Decision That It’s Your Ball To Play
It’s common for players to struggle with the mental block, trying to decide as the ball is approaching if they will be playing it or is it someone else’s?
- You have to watch the server. Too many players just watch the ball. Begin with the server.
- Where are they positioned?
- Where have they served it in the past? (Did you watch this team in a previous game? During warm-ups? Be gathering a feeling for these players’ tendencies and capabilities.)
- As they wind up and toss, is there any change to what they’re doing that gives you information about where they’re trying to send the ball?
- As the ball leaves their hand – maybe 5 feet away from the server, your decision needs to be pretty much made.
Once you’ve decided it’s yours, call it and do whatever it takes to get it. Don’t allow second-guessing, just own it. This takes mental discipline and practice, but you can choose to focus on every serve.
How Should You React?
- Just deciding it’s yours doesn’t make you ready. You have to move your feet! So many players act as if that server is going to deliver the ball right to their lap.
- Don’t brace yourself into a stance waiting for the ball to approach you, stay ready with your knees bent, butt low to the ground, leaning forward and arms ready. When that ball is crossing the net you need to be where the ball is headed.
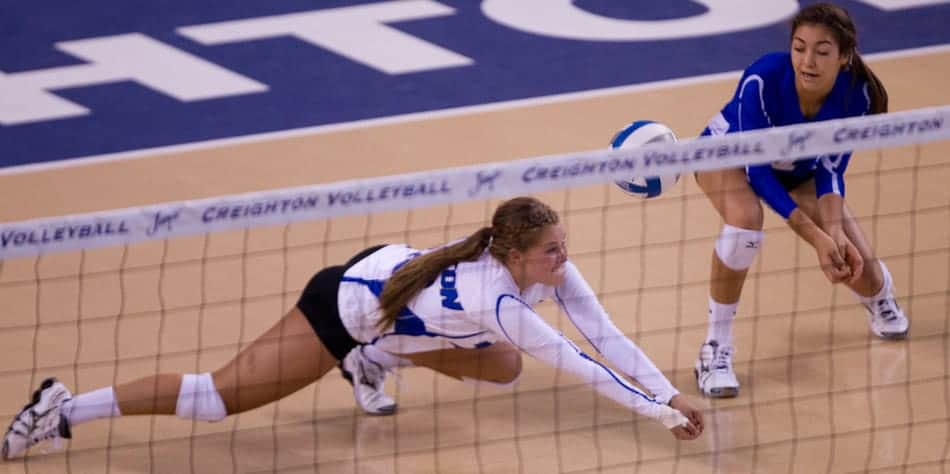
- You want to receive the ball directly in your midline at your waist or just above. If you are reaching and swinging sideways for the ball you simply didn’t make your decision fast enough or you didn’t move your feet.
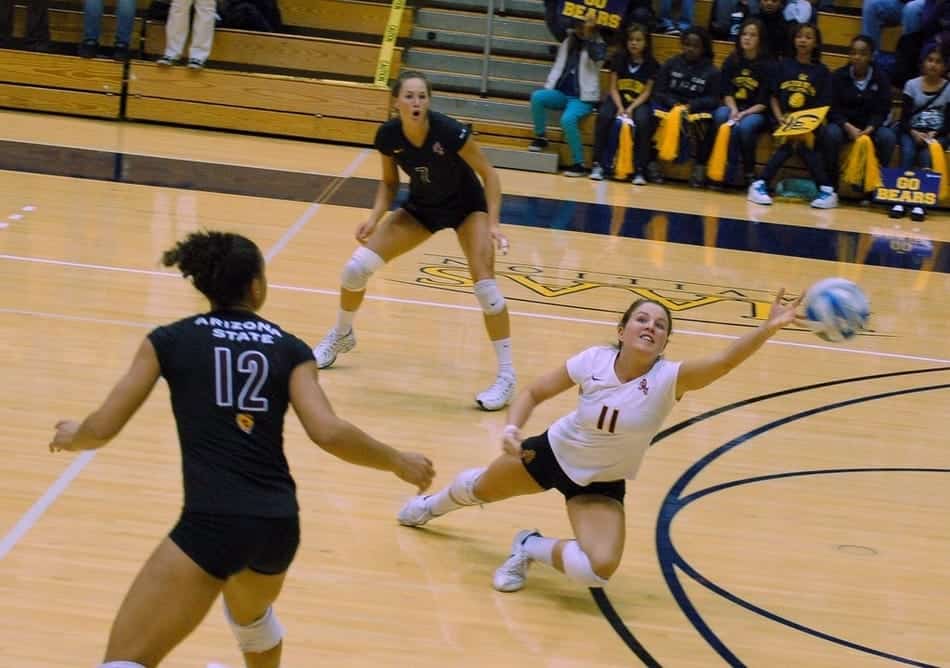
- If you absolutely have to stretch out to the side to play the ball, don’t swing! Your goal then should be to create a platform with your arms that will send the ball to your target without swinging.
Create A Solid Passing Platform
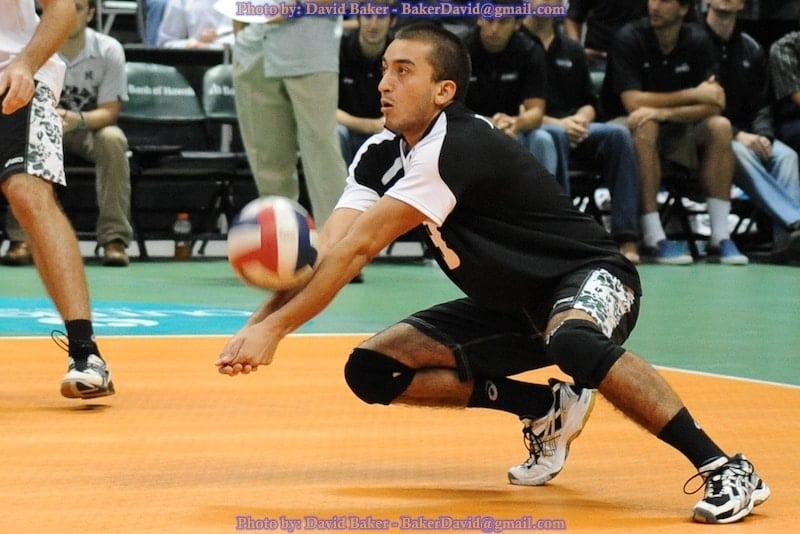
As you receive the ball you want to create a platform that the ball will bounce off. Your hands should be clasped together to keep from doing a double hit. You want to have your arms locked out into a straight position to receive the ball on the meaty (fleshy) parts of your forearms.
Beginners often feel as though they need to swing their arms. You should create a platform with your arms and if more force is needed to send the ball to your target, use your legs. Push your body upward through the pass if the ball isn’t coming with enough force to bounce far enough.
If you find yourself reaching to the side or forward, you didn’t move your feet to get yourself into the right position.
Aim Your Pass Properly
By aiming, you’re creating intention and expectation. You’re not simply “bumping” the ball and seeing what happens. You are going to picture where the ball needs to go and make it a reality.
Your arms need to be pointing in the direction you want the ball to travel. Where is your setter? Where does she need the ball to be placed for an excellent opportunity?
How high does it need to be to give her time to get under it? You should be picturing an invisible rainbow that the ball will need to travel to make this a perfect pass. Are you doing what it’s going to take to make that ball follow that arch?
While your legs can provide a little power if needed to give the ball the right amount of bounce, your upper body will control the pass. With hard driven balls you will sometimes have to let your arms break away with the force of the ball so as to reduce how far the ball will go.
For more detailed tips on how to improve your passing, check out this post about Defensive Specialists.
Drills to Reduce Shanks
Pretty much any serve-receive or passing drill is going to help reduce shanks, but here are a few in particular:
Mid-court Box Serving Drill
Coaches or players stand on two boxes at the 3m line. Players form two lines on the opposite side in serve receive position.
Coaches serve the ball from this closer distance and with a greater angle to increase the difficulty for the receivers. This should be done with a good tempo to keep the players moving quickly. A setter can be placed for target practice as well.
Wall Box Drill
The coach preps the wall with a taped square (or several squares spread throughout the gym). The square size can be as large as the coach deems challenging for the skill level of their players.
The player must practice good form passing the ball repeatedly into the box. The coach should give number goals for how many should hit the box before moving to the next progression.
Progressions can include boxes of different heights, having to get down on one knee, or having to alternate one foot forward, then the other between passes. This drill is to build platform control through an incredibly high number of repetitions in a short period. The coach should monitor and give feedback on good form.
Russian Passing Drill
For this drill players and coaches divide up into groups of 3 and need 2 balls. In your group of 3, the 2 people on the outside each have a ball and the player in the middle will be the only one playing the ball.
The tossers take turns tossing the ball a little too far and high for the middle player so she has to backpedal to pass the ball back to the tosser. Immediately after the pass the other passer tosses, forcing the player to spin and backpedal to get that pass.
NO SETTING OR VOLLEYING during this drill. This drill is about hustling to get into position quickly and learning to control your passing platform when you’re under fire.
Drills to React to Shanks
Deep Shank Chase Drill
Two players take a position in the back row. The coach stands mid-court of the same side and simulates a shank by tossing the ball far outside the backcourt.
Whichever player is on that side has to hustle to play the ball, the goal being to return a playable pass to the center of the court with enough height on it that the second player can play it over the net. Depending on the skills level of the team the coach can require the second player to simply catch or coach their expectations on the kind of hit they’re looking for.
This drill emphasizes sheer speed and determination to save the ball. It also prepares players for what to do with the ball when a save does happen.
Chase the Bounce Drill
The team is lined up in a single file. The coach stands 20-25 feet away from the first person in line.
Beginner Level:
The coach lightly tosses the ball to one side or another and the player has to sprint to catch the ball before it bounces twice. The player returns the ball to the ball cart and then returns to the line.
Advanced Level:
Have your setter take a position and instead of catching the ball, the player has to pass the ball to the setter, ideally letting them catch it above their head without moving much. The setter simply catches the balls and tosses them to the ball cart for the coach to reuse.
This drill is simply about reaction speed. Once the drill has run and the players are really moving well, the coach can point out just how far they are traveling in a second or two.
Laying Down on the Job Drill
Three players lie down at the endline. For this drill one will be a setter, one will be a hitter and the other a passer.
The coach stands with their back to the net. When the coach slaps the ball the players are allowed to move. The coach tosses a free ball and they have to race to react. The passer passes to the setter in the team’s regular setter position, and the setter and hitter execute a normal set and kill.
This drill exposes just how well players can get into position, starting all the way from laying at the boundary of the court. It also emphasizes precise passes because there is only one possible teammate for each hit.
Learning Terms
If you would like to learn about more terms, stats, acronyms, and abbreviations in volleyball, click here.
Learning Defense
To continue learning to play better defense in volleyball, follow this link to read What Every Player Should Know About Playing Defense In Volleyball.
Photo Credits:
Feature Image by KLM volleyball on flickr.com: https://creativecommons.org/licenses/by/2.0/
White and Blue dive image by White & Blue Review on flickr.com: https://creativecommons.org/licenses/by-nd/2.0/
Passing platform image by rust.bucket on flickr.com: https://creativecommons.org/licenses/by-nd/2.0/
One-armed dive image by Ron Hall on flickr.com: https://creativecommons.org/licenses/by/2.0/
Recent Posts
Athletes, listen up! Do you have a closet full of old jerseys, sweatpants, and tees that you just can't seem to part with? Well, dust them off, because you're sitting on a goldmine of fashion...
You may have heard, or you may have noticed, that there's been a change to the rule about double contact in volleyball. In 2022, an experimental rule change began to be implemented, where the double...